Follow Me @glam_foody

Tuesday, February 16, 2021

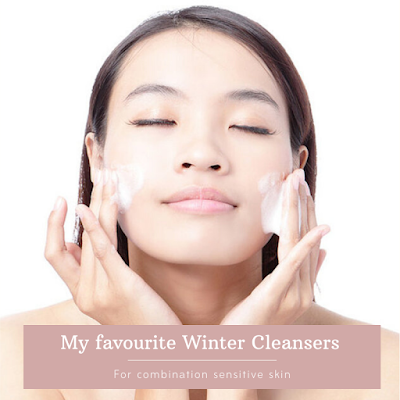
Best Winter Cleansers :

February 16, 2021 1 Comments
best winter cleanser for sensitive combination skin


Hi Besties 😍, How are you feeling now that the winter is almost gone 💜
I am a winter person ❄ ,So I really love the cold weather and the rain 🌧 ,But my skin on the other hand struggle from sensitivity and dryness every winter, while keeping my signature shiny T-zone though 😅
So keep on reading to find out the two heroes that save my skin during the harsh weather ☃

Cerave Hydrating Facial Cleanser :


This one is like the ultimate heavy duty cleanser (I still use it sometimes in summer if I feel like my skin is dehydrated or bit more sensitive than usual ),It leaves my skin soft, moisturized and plump as it has a creamy texture, you feel like washing your face with a moisturizer. It is formulated with three essential ceramides that has been proven effective at restoring the protective skin barrier. Moreover, this formula is fragrance free 😍 which means, No irritation for sensitive skin and it doesn't contain neither paraben or sulfates.❤

I've been using it morning and night for the majority of the winter, you only need one pump, massage it in your skin in circular motions (60s minimum) rinse it with lukewarm water, if it's winter, otherwise cold water would do. Pat skin until dry, then proceed with your normal skin care routine.💚


 La Roche Posay Toleriane Dermo-Cleanser :


Pretty much the same as the Cerave cleanser, This cleanser is so gentle on the skin and has a milky/creamy texture. It cleanses impurities whilst hydrating the skin. With it's minimalist formula, it suits sensitive and reactive skin. It also contains glycerin and LRP thermal spring water, so it help sooth even the most sensitive skin. 
I started using this one last years winter, as I got it as a gift with my LRP Tolerian sensitive cream, I start with applying the cleanser on my skin and massage it to make sure I cleansed my skin thoroughly, then I spray LRP thermal spring water as a toner, and I follow up with LRP sensitive cream as a moisturizer.
With these three steps, I can guarantee that your skin will feel really hydrated and bouncy 💧

Both of these cleansers are life savers in the winter, especially for sensitive skin, so I can't recommend them more. But I would like to point out that you can never use them to remove makeup. I tried once to use Cerave to remove my mineral sunscreen and it was a fail 😅

Note: Don't forget guys to stay safe during these hard circumstances, stay home respect health and safety precautions ❤ and pray for the world 🤲🌍

That's it guys for today's review 😍 see you on the next one 💌

I normally get both of the products from LOOKFANTASTIC Click bellow to purchase ❤


*If You shop there, Kindly use my referral code {NOUHAILA-RH} and benefit from 15€ Off Your 50€ Order 💕

Wednesday, August 5, 2020

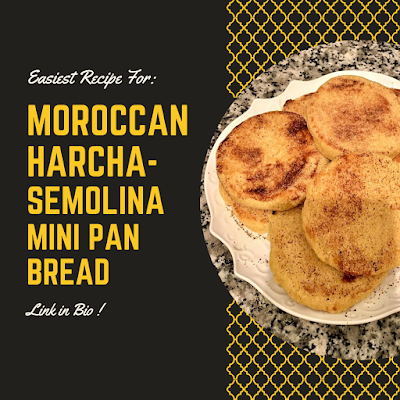
Moroccan Harcha - Semolina mini pan bread :

August 05, 2020 2 Comments

easy Moroccan Harcha


Harcha is a semolina flat bread well known in morocco, You can find it available at bakeries or even at small shops at the local market that specialize at Harcha and Mesemen (Moroccan square shaped dough crepes ). And it is best served warm with a cup of mint tea, and you can spread it with honey, jam, cheese or chocolate or nut spread.

Let's dive in straight to the recipe 😋

First : The ingredients You'll need :


  • 500g Semolina
  • 60ml vegetable oil
  • 60ml melted unsalted butter
  • 7g baking powder
  • 1tsp active dry yeast
  • 1tsp salt
  • 1tbs sugar 
  • 1tbs raw honey
  • 300ml milk


Second : For the preparation :


1. In a mixing bowl, combine your semolina,baking powder,salt and honey. Then add in your melted butter and oil. Mix so that you get a sand like consistency.Then let it rest for 10-15mn.
 
2. Add in your sugar and yest and pour a little of your warm milk to activate the yeast.
3. Pour in the rest of the milk and mix gently with your fingers,Cover the bowl with a cling film then let the batter rest for 15mn.


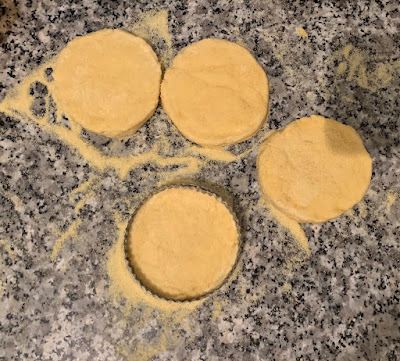
4. Sprinkle your work surface with semolina,Then start shaping your dough with a cookie cutter. You can make them as big as you like.
 
5. Preheat your pan over medium heat, Then reduce the heat to low before placing your Harcha.
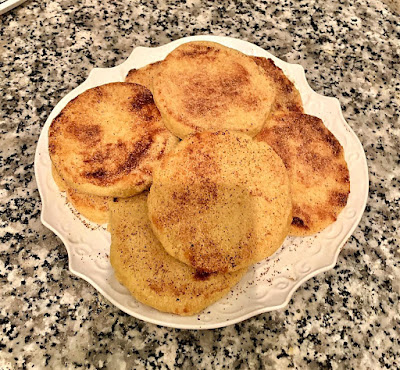
Cook for 3-5 min on each side and remove them from the heat when the Harcha starts to dry and gets a beautiful golden brown color.

And Voilà! You can serve it warm and bon appétit ! 

N.B: Harcha Recipe vary from a family to another, Our recipe is richer and softer than normal Harcha but if you want the original street food recipe, You only need to substitute milk with water,and Butter with vegetable oil. 

Monday, December 16, 2019

Yes or Pass #5

December 16, 2019 6 Comments

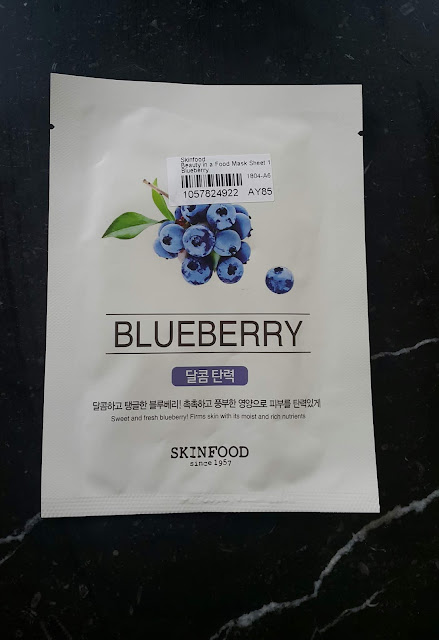
Skinfood Beauty in a Food Sheet Mask : Blueberry


skinfood blueberry sheet mask best sheet mask

Hi my beautiful friends and welcome back to another sheet mask review,from one of my favorite Korean brands Skinfood ;it is a cosmetic brand that roots itself in food,and believes that nutritive food results in nutritive beauty.And it also dates back to 1957.

Today,I will be reviewing their Blueberry sheet mask,that claims to nourish and hydrate skin for a more resilient complexion,as it contains blueberry extract packed with vitamin E and antioxidants.


As always,Before purchasing any product we should run a quick analysis to the ingredients.And what a relief to see that Glycerin is one of the very first ingredients; It helps brighten and moisturize skin, It gives you fast hydration and immediate age-defying results.And then the Blueberry extract That is packed with vitamin A,C and E that works wonders to promote cell renewal,soothes the skin,and prevent sun damage and premature skin.


skinfood blueberry sheet mask

As usual.I followed the instructions on the back and I used my face mask,It had a really lovely sweet fruity scent to it,and after letting it sit on my skin for 10mn,My skin felt so plump and refreshed. 

So I would really recommend trying it.I personally am a huge fan of korean sheet masks and I love not only their magical effects on my skin.But also the experience you get as you feel like you're in a Spa 🧖‍♀️,pampering your skin 😍.

That's all for today's review 💖 I hope you enjoyed it and Thank you so much for reading 💜


Love You Guys XO and see you next post 💞

Wednesday, July 3, 2019

Classic Cinnamon Rolls :

July 03, 2019 40 Comments

best easy quick cinnamon rolls

Hi everyone and welcome back to my baking series 😍
Today,I'm sharing with you the easiest yet most delicious recipe for the all time favorites Cinnamon Rolls ❤ This recipe is my favorite as it has great flavor and texture with the least effort and I guaranty you that you will have a lot of fun making them  💖
So without further a do lets jump to the recipe .

First : The ingredients You'll need :


  • 120ml Water
  • 110ml Milk
  • 350gr All purpose flour
  • 1tsp Salt
  • 9gr Active dry yeast
  • 112gr (1stick) Unsalted butter
  • 60gr Granulated sugar
  • 150gr Brown sugar
  • 1tbsp Ground cinnamon
  • 190gr Powdered sugar
  • 1 Egg
  • 1tbs Vanilla extract

Second : For the preparation :


activate yeast active dry yeast


  1. Warm up the water and milk to the touch,don't over heat it or else it will kill the yeast.Sprinkle the yeast on top of the liquid then add sugar as it will feed the yeast and help it multiply and activate.
  2. Give the mixture a stir so it well dissolve and let it set .
  3. After 10mn you should notice that the mixture has foamed up,which means that the yeast has been activated,then you are good to add 30gr of melted butter (make sure to let the butter cool a bit so that it wont kill the yeast),whisk well then add your egg afterwards.


  1. Add in the dry ingredients : flour and salt slowly to the mixture and combine with a whisk.
  2. After forming the dough,it should become unsticky,put it in a greased bowl.
  3. Cover the bowl with a towel and let it rise for 2h. 


In the meantime prepare your filling :

  1. In a bowl,soften the butter with a fork.
  2. Add in your brown sugar and cinnamon.
  3. Mix well until the sugar is fully coated with butter.


  1. After 2h has past,punch the dough to release the air.
  2. Keep kneading the dough on a floured surface for 5 to 10mn.
  3. Roll out the dough with a rolling pin in a rectangular shape.


  1. Spread the filling evenly  on the dough (You don't  want to miss any spot 😜 you will thank yourself later 😅)


   2. Roll up the dough tightly until you form a log.


  3. Cut your dough into 12 pieces starting from the middle of the log and cutting your way to the sides and try to make them as even as possible.


After placing the pieces in a greased pan,and letting them rise for 1h to 1h30mn,they will double in size and become nice and puffy ,that's when you know that they are ready for the oven.


Bake them in a preheated oven until golden brown,then you can glaze them with with a simple glaze as i did,with 190gr of powdered sugar,1tbs vanilla extract and keep adding milk little by little until you obtain the consistency of your liking.Or you can use a ready to use store bough vanilla glaze 😍


Thank you so much for making it so far 💗 and I would be extremely happy if you send me picture of your cinnamon rolls 💝 on my social media

Instagram 
Facebook
Pinterest


Monday, December 10, 2018

My natural 100% Bio Hair care routine

December 10, 2018 30 Comments

My natural 100% Bio Hair care routine :


Hi GlamFoodies 💁
In this post , I'm sharing with you this hair care routine that I've been trying for couple of months now, and I've been using only Bio products .

So if you want to figure out my hair care routine , keep on reading 😍

And these are the products that I use 💖


First I start with oiling my hair :


After brushing and detangling my hair , I apply this hair care serum on the whole length of my hair (1.5 inches away from the scalp) including my hair ends  , and it icontains a mixture of amazing hair oils : coconut oil ,  Moroccan Argan oil , Jojoba oil and sweet almond oil .


And for my scalp , I apply this amazing anti-hair fall Oil That stimulates blood flow and it contains : Olive oil , Black seed oil , Cade oil and rosemary oil  . 
I massage it on my hair for 5mn to 10mn ( you can use the inversion method for better results )

Afterwards , I wrap my hair in a shower cap that helps providing heat to open your hair pores , to guarantee you will get the most benefits of the oils .


After 2h I jump into the shower .


Shower Time :


Before , I used to apply the hair conditioner first on my end before using the Shampoo .
But since I found this amazing Bio shampoo that is not only parabens and sulfate free , but also based on Argan oil.


Your scalp really feels clean and refreshed after using it , and it also helped me to get rid of my build up oils and my dandruff .


After cleaning my hair , I use this hair conditioner on my ends and leave it for 7mn , then I wash my hair with cold water to close the pores , and I wrap my hair in a towel [ preferably a cotton towel ]


and finally , I let my hair air dry normally , but if I'm in a rush I style my hair as usual .


Thank you guys so much for reading 💓 

You can find all the products that I use in Oleic Bio instagram page .


💥Disclaimer : This post is not sponsored in any way , I'm sharing with you my personal thoughts of these products that I've purchased with my own money 💗   

I hope you guys will like my post and if you have any further questions , do't hesitate to ask me.
I will be more than happy to answer you 💕


See you in my next post 😘💖

Saturday, December 1, 2018

My New Year Wish List

December 01, 2018 1 Comments


Hi Besties ♡,The new year is coming and I wanted to share with you the products that I would love to have for 2019.So keep on scrolling to find out .

Dyson hair dryer :


This hair dryer is amazing,it got a huge hype when it came out 2 years ago,yet it still the best hair dryer in the opinion of every hair blogger,And I really wish that I could lay my hand on it and try it for my self 😍.


Canon EOS Rebel SL2 :


I've heard a lot about this camera's features and how it is beginners Friendly,And I'm really eager to get one, it is a compact DSLR with a large sensor (24MP APS-C) and interchangeable lenses,and the best thing is a very fast dual pixel live view auto-focusing system,not to mention that it has also Bluetooth and Wifi connectivity . 


YSL Tatouage Couture Lip Stain :


I would really love to have this amazing lipstick,let's forget the fact that it's a high end lipstick (worth...) But it's formula is amazing,it's non drying unlike the majority of matte lipsticks,plus it is crazy long lasting and gives an intense color .But,I really can't decide between two shades : 01 and 02.


SK-II Pitera Essence Set :


This set is claiming to be perfect for oily to combination skin,plus it hydrates while providing light exfoliation;which is perfect for my sensitive skin,it helps refining the skin and evening the skin tone,So I'm really eager to try it for my self.

How To Cake It Cakebook :


And finally,What's better than starting the new year with the cake Queen's cake book 😍.This cake book is going to take your baking skills to next level,I'm really hoping that I can lay my hands on a copy for this new year I would be the happiest person in the world if I get to experience her all skill levels cakes recipes .


Thank you so much guys for making it so far hhhhhh ❤

Ps: You can shop my wish list from the links bellow 💗
{Disclaimer : This post is not sponsored,however;some links are affiliated which means I will get small commission if you buy from one of them.Thank you for your support 💓} 

⮇⮇⮇⮇⮇⮇⮇⮇⮇⮇⮇⮇⮇⮇⮇⮇⮇⮇⮇⮇⮇⮇⮇⮇⮇

Thursday, November 29, 2018

Yes or Pass #4

November 29, 2018 0 Comments

COSRX: Acne Pimple Master Patch :


Hi Babies ❤,Today I'll be reviewing these acne patches by this brand named COSRX,This product is one of their best sellers,and it still gets a huge Hype.As it claims to help treating partial skin trouble,by developing damp environment  and keeping exudation with it's different size of patches that are convenient for every pimple size (7mm,10mm,12mm) .


When you open the package,you will find 24 patches (7mm*10,10mm*5,12mm*9),You pick the patch according to the size of your pimple .


For the directions,you will find them in the back as usual :
  1. Clean your face before applying the patch (do not use any lotion or essence) .
  2. Select the patch according to your problematic area .
  3. Place the patch on the problem spot after tearing it from the protective film .
  4. Replace the patch if it turns white due to exudation.


❗❗ The following picture has gross content ❗❗


As you can see the result was amazing,This tiny patch did absorb all the oils and gunk from my pimple and dried it out,I really highly recommend it as it did empress me very much , and it quickly became my go to pimplebuster 😅.

Thank you so much guys for reading my review 😍

Love you XO 💗

You can get this patch by clicking here .

{Disclaimer : This post is not sponsored,however;some links are affiliated which means I will get small commission if you buy from one of them.Thank you for your support 💓}